 As a blogger or business owner, you know that the content that you provide to your readers has to be of the highest quality. Images are just as important as the words on your site, and in some cases, can be more critical to maximizing the success of your website.
1. Choose the Best Image
No matter what your website offers, it is smart to choose the best image for what you are presenting.
If your site is catered to dog owners, for example, do not post images of cats and lizards. Think about what your viewers are looking for when they come to your website. They are expecting a quality presentation. Give them images that draw them in and make them want to read more or check out your online shop.
For photographers, choosing appropriate images is easier because in most cases you can shoot what you want to see. This is especially true if you also sell your pictures. Depending on what sort of photography that you do be careful with how you edit your images.
Portrait photography might not want to have psychedelic colors swirling above the faces of those in the picture. Study what kinds of edits best optimize the type of photography that you do.
A well-edited photograph will look great on your web page if it fits your website’s style.
Not everyone who blogs or runs an online business is a photographer, and that is why there exist a plethora of magnificent spots to grab a free image.
There are tons of places to get stock images. If you are unsure of where to find great images you can explore:
- Flickr
- Shutterstock
- Pixabay
- Alterables
Each of these sites gives you access to open source images from every subject you can think of. You are bound to find what you are searching for. Check if the pictures require a link back to the source or any credit. Most stock photography sites do not, but it is smart to read as much as you can before going with an image that is not your original work.
If you want to use an image from Flickr that isn’t marked as creative commons be sure to contact the original photographer before you think about using it. Simply ask for their permission and be respectful of their art!
The last thing you want is to be hit with a DMCA request and be forced to take down the image or suffer legal consequences. That is a surefire way to guarantee a quick demise to your dreams of running a successful Internet shop or blog.
2. Use Efficient Image Descriptions
Image descriptions need to be efficient, well-worded and easy to read to optimize their effectiveness.
When people use a search engine to find a product they enter specific descriptions. Looking for a case for a Samsung Galaxy S5 might be inputted as “Galaxy S5 case” or “Samsung Galaxy Cases.” Label your images in a way that keeps it concise and focused on what you are presenting.
Search Engine Optimization considers image file names when producing results. It is essential to keep that in mind when thinking of keywords to use in your image names. Check out the statistics included on your website through your analytics provider. See what keywords most often led visitors to your website. Take that into account when thinking up catchy image descriptions.
Something you can do to get a feel for how SEO works is to search for something you are interested in. See what sorts of images come up, and study the phrases used with each search. Try out every combination that you can. Watch what works and what does not. Be aware of what gets the most hits. Use this to your advantage when putting keywords on your website’s images.
Pay attention to what your audience looks for and capitalize on it. Be creative in all aspects of your site, even on the micro level of image file names.
Star SEO tip: avoid lengthy descriptions that have little or nothing to do with the image. Ensure efficient results and keep everything tight and relevant.
3. Pick A Fitting File Type
Images come in many different file types. Each file type has a different size and will cause the image to be shown in varying levels of quality. Pick an appropriate file type when uploading images to your website.
Some of the more common file types used today are:
- JPEG
- GIF
- PNG
- BMP
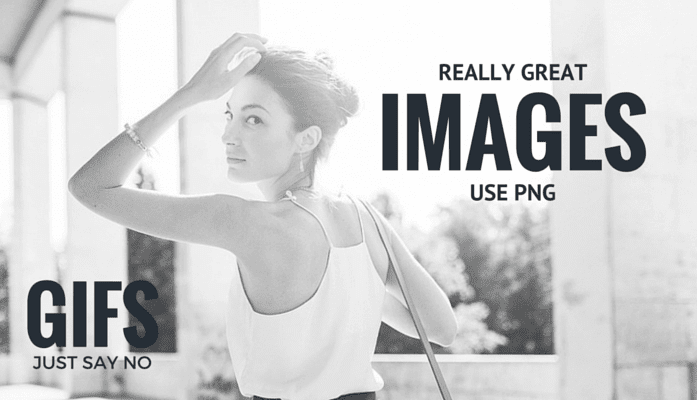
When you upload an image to your site make sure to be aware of the file type. Going with the wrong one might make that image less effective. When a large, high-resolution image is needed a GIF will not have the best quality. The file type of your image should fit with the use you intend for it to have.
The most common image type online is a JPEG file. These files are of good quality and are small. With a JPEG you can use smaller images such as thumbnails that remain clear. You can also use JPEGs for larger resolutions. It is the best all around file type to use when optimizing images.
If you want something small for icons, go with a GIF or BMP. They are great for tiny icons because of their low pixel count and size. GIFS are fun because they can also be animated. When used in good taste a well-placed GIF can make your website more exciting. You might be tempted to include 1000 GIFS of animated dancing cats, but that will not cause more purses to be sold, for example.
For large images of beautiful landscape photography or wedding portraits, you might want to use a file type that emphasizes high resolution. A good example would be a TIF file, a file type that is lossless and can be enlarged without being grainy. Having a smaller size open into a new tab upon clicking is a smart way to cut back on bandwidth while granting many viewing options.
Always consider bandwidth limits that your web hosting grants you. Larger images and lots of traffic might cause bandwidth issues. This restriction is something to be avoided unless low traffic is what you want, and the chances are that is not the case.
4. Avoid Clutter
When thinking of your website design, you may be tempted to fill all of the space with pretty images. While that might seem like a fun way to attract more visitors, it is not the best option.
How many times have you been on a website and noticed nothing but images? You do not want that to be your site unless the site is focused on something like photography and words are not needed to express what you are trying to say.
In most other cases be smart about image placement. Put them in your blog post sparingly. Have a homepage with a central image and smaller icons for separate pages.
Design your site’s theme using smart color choices that remove the need for filler images. Think of savvy ways to keep a consistent flow to your website. Pictures can make that easier but can also break your site. Too many images will slow down visitors who want to see what you have to share.
Avoid clutter as much as you can if you want people to return to your page. Present something engaging, clean and made for their viewing and reading pleasure. They do not want to have their eyes checked each time they try to navigate your website.
5. Smart Alt Titles
Not everyone who visits your site will have images enabled on their browser. Perhaps this is due to poor web connection or other reasons, but you want to make sure that they still find your website.
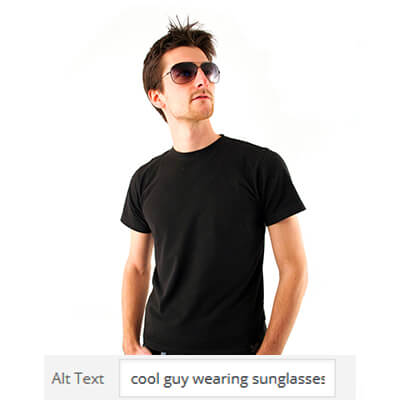
Alt titles are used by search engines to discover what your images are best described as so that people can optimize their searching. A good alt title will lead more visitors to your website because your page will show up in more search results. Alt titles not only describe what your image is but also indicate to search engines what the content surrounding the picture is all about.
Failing to think about optimal alt titles can lead to less traffic to your website. Read about what alt titles work best in your related market.
Know what your audience likes to type into the search bar. Create alt titles that will bring them to your site. There are millions upon millions of web pages on the Internet today. It is easy to get buried beneath the competition, but if you optimize alt titles, you will break through the mass of sites and step ahead of the others.
Google even admitted that alt titles are one of the more essential factors it uses when giving users answers to their searches.
Google knows what they are talking about when it comes to searches and optimization. They are known across the world as the best search engine and for a good reason. Take advantage of this and make some excellent alt titles to go with your images.
Using great alt titles is an optimization tip that will bring your site into more results and deliver more visitors to you.
6. Go With Relevant Thumbnails
Thumbnails are a vital part of product presentation. If you do not choose a relevant image for the thumbnail, you can drive away potential customers. A clear thumbnail shows the customer what they are getting. It does not distract or hide what is being presented.
Your site might have an e-commerce platform that allows customers to purchase whatever it is that you offer them. When they are scrolling through your shop, they want to know what each product is without having to click each one.
For bloggers, thumbnails are sometimes used to link to different blog posts. Make the images relate to the content behind them. If a picture is used inside of the post, it will make an excellent thumbnail.
Be careful when putting an image in the thumbnail spot as the wrong one can be detrimental to a potential purchase. Pick an image that captures your product or page without being too distracting and irrelevant. It is probably not a good idea to use a picture of the moon when you are selling coffee beans.
It almost goes without saying that file sizes should also be small. The last thing that you want to happen when a new user tries to load your page is a crawling load speed due to an abundance of large thumbnail files. They are small images and do not need to be stuffed with data.
Remember to consider the file type as was discussed above. A small format like a GIF or PNG might make for an excellent thumbnail while a TIF might be too much.
Optimize your page with smart thumbnails.
7. Smart Image Alignment Inside Text
A reader of a blog wants to have a smooth experience. Correctly aligning your images can help your visitor have an easy read.
If you have ever seen an image placed inside of a blog post that ruined the flow of the words, then you know that it is a situation to be avoided. Consider the layout of your page and plan image placement accordingly.
A good rule of thumb to use is to keep the image no wider than the column of text. This way it fits nice and snug inside your post without breaking the form of the page. A clean page that keeps readers reading is a page that will bring them back for more.

Image alignment is especially important if your site has responsive design. You always want to check out how your pages look on every device and platform possible.
Load your new post on your mobile device, open it in different browsers and send it to some friends to make sure that the images are working as best as they can inside of each post.
8. Keep File Sizes Down
Images that are too big or too small can cause a range of problems for your visitors. Optimize each image size to fit into its intended use.
For header images, photo galleries, and background images it is important to use large image sizes because you want the extra high resolution to be the focus of the viewer. Large photos do not have to have massive file sizes.
Large image sizes come with their own set of problems, however. The bigger the file the slower, the page will load, and load times are one of the most critical aspects of having a successful website. Users do not always have the patience to wait for all of your pages to load before they exit and look for something quicker.
You can reduce the size of the file without killing the resolution by opening your image in a photo editor and adjusting the export settings. Programs like Adobe’s Lightroom allow you to export at different qualities without destroying the image.
Play around with different file size settings and try to reach a safe middle ground where the image quality remains high but the file size gets as low as it can.
You might not have a powerful editor like Photoshop or Lightroom. Do not fear as there are many free programs available including:
- GIMP
- Pixlr
- IrfanView
- Picasa
9. Use the Right Dimensions
The dimensions of the images that you choose for your site should follow some simple rules to optimize them on your website best.
The first rule to remember about image dimensions is to never go over the width of your text. This guideline was briefly discussed above, but it is vital to keeping your page optimized as best as possible. The image does not need to be wider than your text column as this will only make your page clunky and inefficient.
The second key point is that pixels per inch (PPI) is not relevant to quality or file size. This fact is important to keep in mind because it can be confusing looking at all of the export options.
The file size will change depending on the dimensions of the image. Remember to keep the proportions fitting to the use. Never forget that large file sizes and dimensions can slow down your page for viewers so do not overdo it with huge images.
Dimension Examples
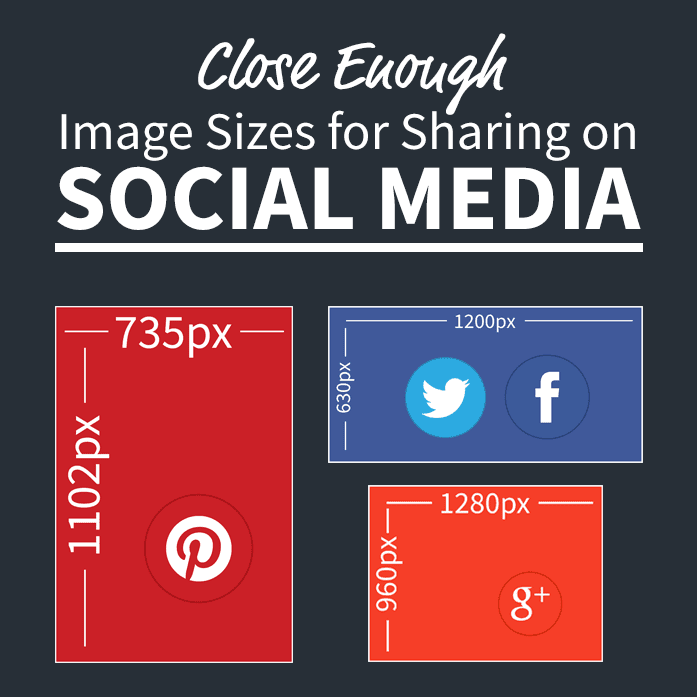
Header image dimensions usually fall between 800 to 1200 pixels wide and 100 to 400 pixels tall. Many website editing platforms will automatically crop an image to fit into the header slot but if it does not keep these numbers in mind.
Thumbnail dimensions are best kept at 90×90, 100×100, 125×125 or 150×150. This range keeps them at the appropriate size for their use.
Inserts into a blog post are good at anything between 300 pixels wide and 450 pixels wide, but this will vary depending on the width of your text column. Remember that there is the option for readers to click on the image and open it in a different tab at a larger size.
10. Be Careful With Your Links
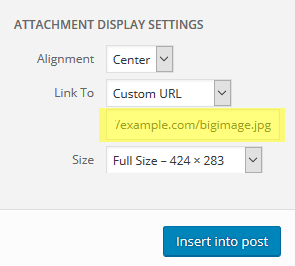
Images can link to anything that you want them to. If you choose to make your images links it is smart to keep the links relevant to your page.
You do not want to link your images to outside sources that will bring readers further from your website. You want all traffic to be directed to what you offer, not to unnecessary pages. If, for example, you have a photo gallery perhaps clicking on an image will lead to purchase options. You do not want it to send the one clicking to a YouTube channel on fly fishing.
Be care with how you setup all aspects of your website. The more that each page and image is connected to other parts of the whole will determine the success of your site. Maximize the flow and design. That includes links inside of your images.
In many cases linking anything to your image is not something that you will need to do. If you are afraid of making a mistake in the setup of your website do not have the image link to anything. Keep it simple and bring in returning customers.
11. Listen To Your Audience
The most important aspect to running any successful community, business or blog is to be an active voice.
Ask your readers how they feel about the images. See what each user has to say about what you are showing off to them, and take all feedback as the lifeblood to your website. Your readers come to you to listen to what you have to say and to see what you have to show them. The importance of their voice cannot be stressed enough.
Comment back when comments are left. Engage in the discussions that your audience is having. If a reader or customer has their own blog or website go ahead and leave a comment on the beauty or efficiency of their page.
Keep the dialog open between you and your audience. This makes everyone who visits your page feel like they are in a supportive and caring space.
Try out different images with different pages and see what garners the bets response. Pay attention to the site analysis tools provided with your web host. Have your eye on the pages that draw the most views and try to match that evenly across your website.
Conclusion
Optimizing each page to include quality images will take your blog, business or website to new levels of success. Spend time researching what works and eliminate what does not. Give your website visitors something to remember, and welcome them back with the best content possible.